Plastering a damaged wall can be a daunting task, but given the right guidance, it can be a straightforward and fulfilling project. Here's all you need to know!
- Get the Wall Ready: Before you begin plastering, make sure to prepare the wall. This includes removing any loose paint, filling any cracks or holes, and ensuring the surface is dust-free.
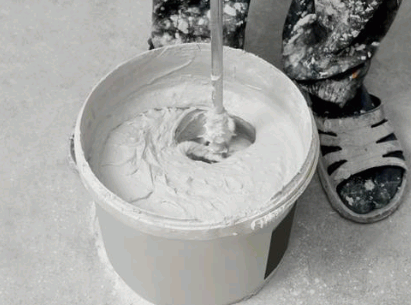
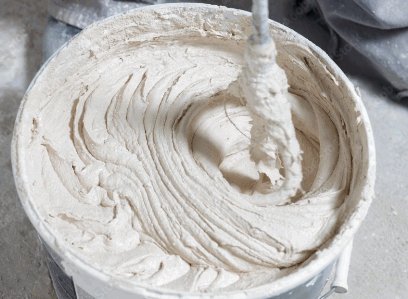
- Blend the Plaster: Next, mix the plaster according to the instructions on the package. Use a clean bucket and a mixer drill attachment for a smooth blend.
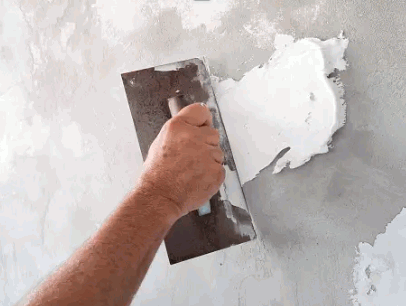
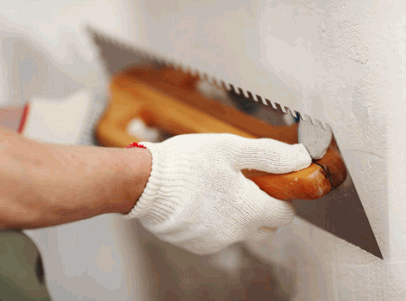
- Apply the First Coat: Spread a thin layer of plaster evenly across the wall with a trowel or hawk. No need for perfection, it's just a base layer.
- Float and Skim: After about 30 minutes, use a sponge float or trowel to smooth any imperfections in the wall's texture.
- Apply Further Coats: Depending on the damage, you may need multiple coats of plaster. Repeat steps 3 and 4 until the desired result is achieved.
Remember to allow each coat sufficient time to dry before applying another layer or sanding down any rough spots. Patience is key!
Also, don't forget proper ventilation. Plaster can produce dust particles that can be harmful when inhaled excessively.
Tools And Materials Needed For Plastering
Plastering walls that are damaged requires the right tools and materials. Here's a list of 6 items you need:
- Trowel: Use it to apply and smooth the plaster.

- Plastering hawk: Hold and spread the plaster with it.
- Bucket: Mix plaster and water in it.
- Sandpaper: For smoothing imperfections after plaster dries.
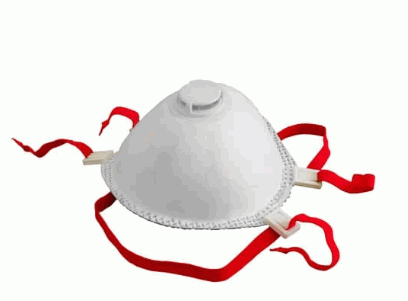
- Dust mask: Wear it to avoid inhaling fine plaster dust.
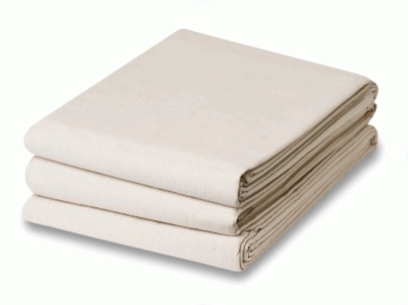
- Drop cloth: To protect floors and furniture.
For an even better plastering job, use fiberglass mesh tape to reinforce corners and joints before applying plaster. And, dampen the surface with a spray bottle filled with water before the first coat.
Fun fact - Did you know that ancient Egyptians used lime-based plasters over 4,000 years ago? Plaster has really stood the test of time!
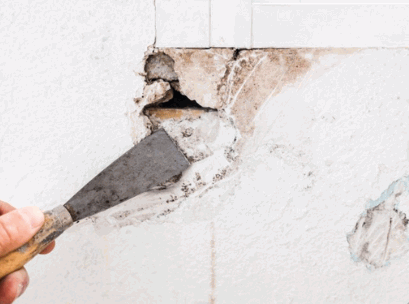
Preparing The Damaged Wall For Plastering
- Scrape or sand away any loose paint, wallpaper, or plaster from the damaged area.
- Wash the surface with a mild detergent and warm water to remove dirt, grease, or stains.
- Use a putty knife to fix any cracks or holes in the wall. Make sure it's level with the surrounding surface. Let it dry.
- Sand the repaired area with fine-grit sandpaper until it's smooth.
- Paint a primer on the whole damaged area. Let it dry as instructed by the manufacturer.
- Finally, apply a thin coat of bonding agent to enhance adhesion between the existing substrate and the new plaster.
Remember to wear protective gear, like gloves and glasses, when dealing with chemicals or tools.
Pro Tip: Before plastering, make sure all necessary repairs are done and the wall is clean and primed. This will ensure a professional-looking finish that lasts.
Mixing Plaster And Preparing The Area
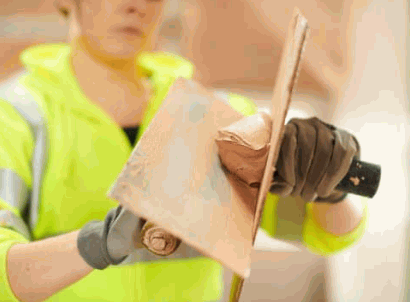
Gather all tools and materials, like a mixing bucket, water, plaster mix, a trowel, a sponge, and protective gear such as gloves and goggles.
Clean the damaged wall surface with a scraper or sandpaper for a smooth surface.
Measure the plaster mix and pour it into the bucket. Gradually add water while stirring until smooth. Let the mixture rest for 5 minutes before stirring again. Apply primer if needed.
Use a trowel to spread the plaster from bottom to top. To get creative, use different trowels or sponges to add textures or patterns. Refer to manufacturer guidelines for specific preparations.
Fun Fact: Plaster has been around since Ancient Egypt!
Applying The Plaster
- Clean the wall with a brush or vacuum to take away any loose debris or dust. Ensure the wall is dry and grease/oil-free.
- In a clean container, mix the plaster with water as per instructions. Use a stirring stick to get a lumps-free consistency.
- Grab a trowel and apply the plaster to the damaged area with even strokes. Spread it thinly and cover all imperfections. Smooth out with upward strokes.
- Let the first coat dry, then apply subsequent coats gradually until the surface is level and seamless. Don't give up if your first attempt isn't perfect.
Pro Tip: Before the last coat, mist the surface with water for better workability and a smoother finish.
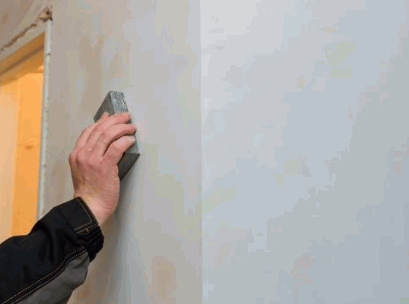
Smoothing And Finishing The Plastered Wall
Inspect the plastered wall for any visible bumps and ridges. Use a sanding block to carefully smooth them out.
Apply a thin layer of joint compound using a trowel or putty knife. This will help fill in any imperfections and make a smooth base.
Once dry, lightly sand the surface again to remove any roughness. Use fine-grit sandpaper and work in circular motions.
Prime the wall before applying paint or wallpaper. This will seal the surface and guarantee proper adhesion. Choose a quality primer for your chosen finish.
Finally, when the primer is dry, apply your desired finish treatment. Follow the manufacturer's instructions for the best results.
Remember, patience and preparation are key when smoothing and finishing a plastered wall. Taking your time will result in a perfect end result.
By the way, it usually costs between $750 - $2,000 to hire a professional to plaster walls, according to HomeAdvisor.
Painting Or Decorating The Plastered Wall
- Get ready: Make sure the plaster is totally dry and has no dust or trash. Use a moist cloth to wipe the wall and remove anything loose. This will make a nice canvas for painting or putting up wallpaper.
- Put on primer: Before you paint or hang wallpaper, put on a layer of primer. This will help the paint or wallpaper stick better to the plastered wall and stop any bad stains or color changes.
- Pick your paint or wallpaper: Now comes the fun part! Choose a top-notch paint or wallpaper that's perfect for you. Think of things like color, texture, and durability when you make your choice.
- Pro Tip: If you choose wallpaper, measure it properly and make sure the patterns go together nicely. Remember, the better you prepare, the better your plastered wall will look when you're done!
Final Touches And Maintenance
- Remove dirt and rubbish from the wall with a soft brush or cloth. This will help the next layers stick better.
- Check for any small cracks or dents from plastering and fill them, let it dry.
- Sand lightly with fine-grit sandpaper to make the wall smooth. Don't sand too much so you don't damage the plaster.
- Prime the patched spots and the entire wall. Priming seals the plaster, makes the paint stick, and gives an even layer for the paint.
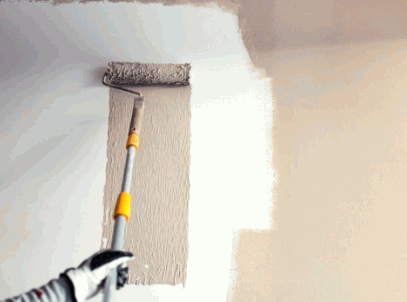
- Paint with quality brushes or rollers. Put on multiple thin layers for better coverage, and let each layer dry before the next.
- Inspect walls for any signs of wear or damage and fix them quickly.
- In the past, civilizations used plastering for both structure and looks. They used natural ingredients to make durable plaster for their homes.
Follow these steps and tips to keep walls in tip-top condition and make your space look great.
Conclusion
Plastering a damaged wall can be intimidating. But, with the right knowledge and techniques, it can be done easily. We discussed the steps of plastering a damaged wall: from preparing the surface to applying the plaster and final touches. If you follow these steps, you can have a professional-looking and long-lasting finish.
To start, it's essential to prepare the damaged area. Clean it and remove any loose debris or old paint with a wire brush or scraper. Also, fill in any cracks or holes with an appropriate filler and sand it down for a smooth surface.
It's also important to use high-quality materials. Invest in good quality plaster mix for an easier job and a better finish. Use tools designed for plastering like trowels and floats to achieve a more even application.
While plastering, spread it evenly with sweeping motions. Take breaks between layers to let each layer dry properly. Follow the manufacturer's instructions for drying times and recoating intervals.
After applying multiple coats of plaster and allowing them to dry, sand down any imperfections for a smoother finish. Use fine-grit sandpaper to remove any rough edges or bumps before painting or adding wallpaper.
