Lime plastering is a technique used for centuries to make strong and beautiful walls and ceilings. It involves mixing lime, sand, and water and then applying it to a substrate, such as stone or brick. Ancient civilizations used it in temples and palaces.
It has many advantages. It lets walls "breathe," preventing condensation and mold. It has an attractive natural look, adding character and charm. And it's available in various textures and colors.
It's also environmentally friendly, with natural materials and no VOCs. But remember to prepare the substrate before applying the plaster. This will create a strong bond and give you a long-lasting finish.
What Is Lime Plastering?
To understand what lime plastering is and how it can benefit you, delve into its brief history and the advantages it offers. Discover the roots of lime plastering and explore the advantages it brings to your construction or renovation projects.
Brief History Of Lime Plastering
Lime plastering has an intriguing history. It goes way back to ancient civilizations like the Egyptians, Greeks, and Romans. They knew the advantages of using lime as a building material for insulation, water resistance, and smooth surfaces for art.
In medieval Europe, lime plaster became trendy with the rise of Gothic architecture. This lets craftspeople create intricate carvings and details. Lime's versatility enabled dazzling architectural features that we can still admire.
The Renaissance period brought more lime plaster use in Europe and elsewhere due to colonization. It was well-liked for its strength and fireproof qualities. Many old-timey buildings used it and are still standing today.
Presently, lime plastering is having a revival. People are realizing its benefits, like it being a natural alternative to chemically-filled modern materials and its breathability which prevents dampness and mold.
Pro Tip: When working with lime plaster, stick to proper techniques and guidelines. Get professional help if you're not sure about something.
Benefits Of Using Lime Plaster
Lime plastering is a popular choice for builders and homeowners. Its eco-friendliness, durability, versatility, and breathability make it stand out. It is made from natural lime, sourced from limestone, and doesn't emit any harmful chemicals. Plus, it's been around for centuries and can withstand weather conditions. It can be used on walls, ceilings, and restoration projects, adhering to various materials. It also lets walls breathe, absorbing and releasing moisture, and preventing mold growth.
What's more, lime plaster self-heals small cracks over time, meaning less maintenance is needed. It has a natural resistance to fire and acts as a thermal insulator. Its history dates back thousands of years - the Egyptians, Greeks, and Romans used it for its strength, durability, and aesthetic appeal. , it has fire resistance and insulation capabilities, making it a timeless building material.
Materials And Tools For Lime Plastering
To master the art of lime plastering, equip yourself with the necessary materials and tools. Discover the types of lime used in plastering and explore the other essential materials required for the task. Additionally, familiarize yourself with the array of tools that are indispensable for achieving flawless lime plastering results.
Types Of Lime Used In Plastering
In traditional lime plastering, three main types of lime are used: hydraulic, non-hydraulic, and hydrated.
Hydraulic lime sets via a chemical reaction with water, making it good for moisture-exposed areas. Plus, it is highly durable.
Non-hydraulic lime hardens through carbonation. It is ideal for interior applications or places safe from water. It offers great breathability and flexibility.
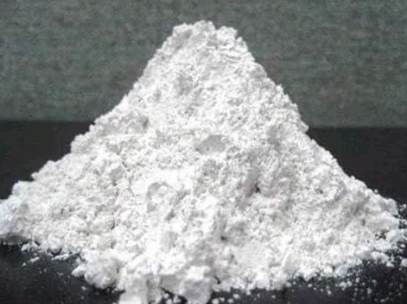
Hydrated lime is made by adding water to quicklime. It is multipurpose and often used as a base coat or primer.
Variations of each type exist, like feebly hydraulic limes, moderately hydraulic limes, and eminently hydraulic limes.
By knowing the characteristics of each lime, plasterers can choose the best one for their project, ensuring great results that last.
Other Materials Needed For Lime Plastering
Lime plastering needs more than the basics. Here are 4 must-haves:
- Lime Putty: This is the key ingredient. It's made from slaking quicklime and water.
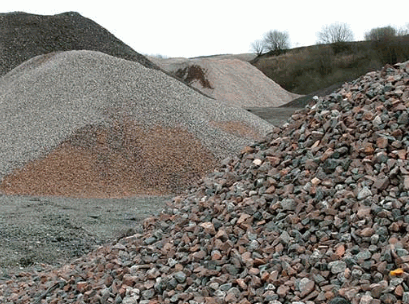
- Aggregate: Sand or crushed stone gives a durable, textured finish.
- Fibers: Jute or sisal fibers add strength and crack resistance.
- Pigments: Natural earth pigments can be used to add color.

Tools like trowels, floats, brushes, and buckets are also necessary.
Experiment with different materials to explore textures and finishes. Transform any space into a masterpiece with lime plastering!
Tools Required For Lime Plastering
To plaster with lime, you need certain tools. These tools make it easier to apply the plaster and get a smooth finish. The essential tools are:
- Trowel: For applying the plaster and smoothing it out.
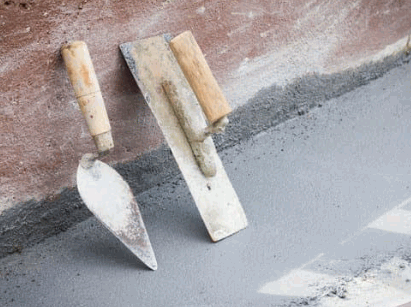
- Hawk: A flat board with a handle for holding and distributing the plaster.
- Float: To level and smooth out any imperfections.
- Brush: For cleaning and wetting the surface before plastering.
Choose high-quality tools for better plastering results.
For extra details, use a water spray bottle to keep the surface damp. Also, use mesh or chicken wire for thick coats of plaster for extra strength.
Before you start, clean and prepare the surface. This will ensure the plaster bonds properly.
Preparing The Surface
To prepare the surface for lime plastering, evaluate the condition of the wall, remove existing paint or wallpaper, and repair cracks and holes. Each sub-section tackles a specific aspect of surface preparation, ensuring a smooth and stable foundation for the application of lime plaster.
Evaluating The Condition Of The Wall
Assess the wall's structural integrity and inspect for any flaws. Look for cracks, peeling paint, or signs of moisture. Feel the wall's surface for roughness. Tap lightly and listen for hollow sounds. Check for discoloration or stains. Examine corners and edges for wear or deterioration. Document observations for a report.
Pay attention to mold or mildew, which could mean hidden moisture. Use a moisture meter to detect leaks or condensation. Consider consulting with professionals for expert advice.
Evaluate the wall first for surface preparations. This will save time, effort, and resources. Plus, it'll improve the outcome of the project.
Removing Existing Paint Or Wallpaper
Steps for paint or wallpaper removal:
- Gather the tools for the job: scraper, putty knife, sandpaper, chemical solvent, and maybe a steamer. These will make it easier to strip paint or wallpaper.
- Protect floors and furniture by laying sheets or drop cloths around the surface.
- For paint removal: scrape off any loose paint with a scraper or putty knife. Smooth rough edges with sandpaper.
- For wallpaper: use a scoring tool to puncture the surface, apply a solvent, and peel away with a scraper.
- For extra help, use a steamer or heat gun to loosen layers, and test different methods.
- Work carefully and systematically, ensuring the surface is prepared for treatments.

Repairing Cracks And Holes
For a perfect finish, follow these three steps:
- Assess the damage. Examine the cracks & holes. Note their size & depth.
- Ready the area. Clean with mild detergent & water. Remove loose debris.
- Do the repairs. For small cracks, use high-quality spackling. Fill in with a putty knife. For larger holes, use a joint compound with mesh tape for stability.
Pay attention to detail when repairing. Follow these steps for a great foundation.
Keep the weather in mind. Different temperatures affect drying times. Exterior surfaces need materials that can handle outdoor elements.
Take action to repair cracks & holes quickly. Save time & effort for a beautiful outcome!
Delve into: How To Plaster A Damaged Wall
Mixing And Applying Lime Plaster
To achieve a flawless lime plastering job, you need to master the art of mixing and applying lime plaster. Properly mixing the lime plaster is crucial for its success. Then, you'll learn the technique for applying the first coat of lime plaster. Finally, we'll explore the process of applying subsequent coats and achieving a smooth finish.
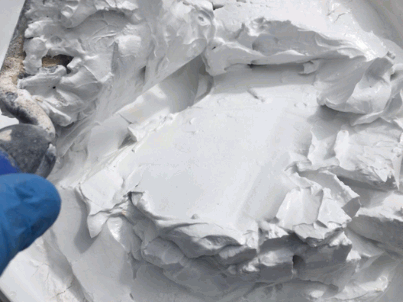
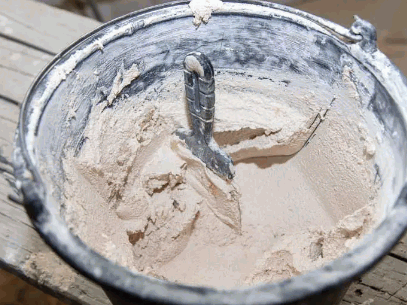
Mixing Lime Plaster Properly
Accurately measure ingredients:
- Start by measuring the lime putty, sand, and water in the recommended ratios.
Mix it up:
- Pour the lime putty into a clean bucket.
- Gradually add water while stirring continuously.
- Then, add sand until you get a homogeneous consistency.
- Take your time and avoid lumps or clumps.
Test the consistency:
- To check if your lime plaster is good to go, do a "ribbon test".
- Grab a handful and let it fall back.
- If it forms a ribbon-like shape without breaking, you've got the right mix.
Protective Gear:
- Wear gloves and goggles.
- Also, use clean tools to avoid contamination.
Patience is key!
Different Types:
- Different types of lime plasters require different mixing techniques.
- For example, hydraulic lime needs less water than hydrated lime, due to its quick-setting properties.
History:
Throughout history, lime plaster has been used in many construction projects.
From Roman villas to European castles, artisans have perfected their mixing techniques over centuries, leaving behind amazing works of art.
Even today, their craftsmanship continues to inspire architects and craftsmen worldwide.
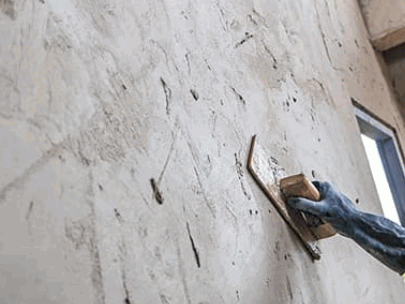
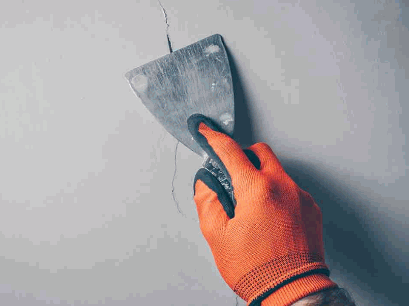
Applying The First Coat Of Lime Plaster
- Start your project off right by giving the surface a thorough clean and getting rid of any loose debris.
- Spritz or brush the wall or surface with water to help the plaster stick and avoid drying too quickly.
- Mix the lime plaster as per instructions, using a fresh container. Ensure the mix is smooth and lump-free.
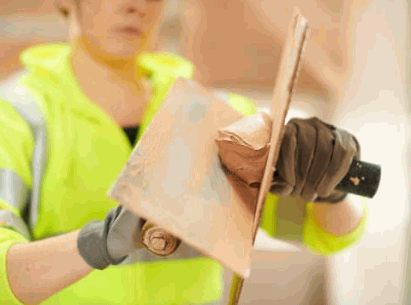
- Apply the plaster in even, horizontal strokes using a steel trowel. Start from the bottom and keep the thickness even.
- For a top-notch result, angle the trowel slightly when applying to create a textured effect.
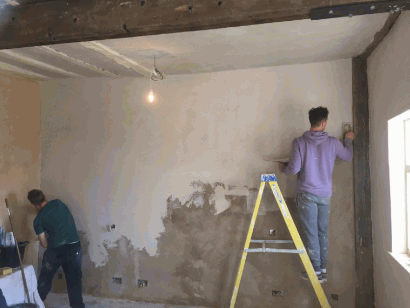
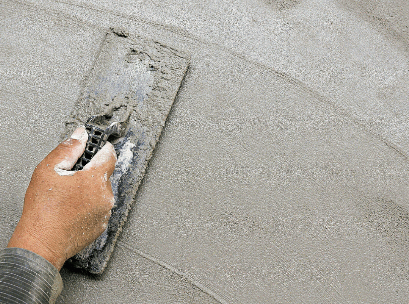
Applying Subsequent Coats And Achieving A Smooth Finish
- Before applying coats, be sure the previous layer is completely cured and solid. Use a brush or scraper to remove any debris.
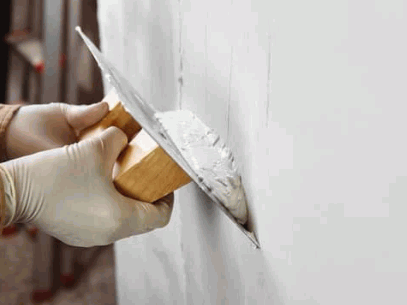
- Mix lime plaster according to instructions. Using a trowel, apply an even layer. Systematically cover it to avoid gaps.
- To smooth out irregularities, use a float or damp sponge. Skim the surface with consistent pressure.
- Depending on the desired finish, you may need to repeat the steps. Wait for each coat to dry before applying the next one.
- When applying coats, monitor the drying time closely. Allow lime plaster enough time to cure properly.
- For a smoother finish, use fine-grit sandpaper after each coat has dried.
- Maintain moisture levels during curing. Spray a light mist of water on each layer.
- By following these steps, you can achieve an impeccable finish. It will enhance aesthetic appeal and provide lasting quality.
Curing And Finishing
To ensure the durability and aesthetic appeal of your lime plaster, it is crucial to focus on the curing and finishing process. Explore the importance of properly curing lime plaster, the various methods available for curing, and the options you have for finishing your lime plaster.
Importance Of Curing Lime Plaster
Curing lime plaster is key! An improper cure can cause cracking, poor adhesion, and more. With proper curing, you get a strong, durable finish that looks great too!
Take your time to cure it right. Moisture is necessary for optimal hardness and an even texture. Plus, it helps avoid discoloration and other flaws.
But, if you rush, you'll be sorry. Cracks can appear, damaging the plaster and costing you in repairs. Don't cut corners; cure your lime plaster properly!
Methods For Curing Lime Plaster
Plastering is a must for construction, and for a perfect finish, proper curing is key. Let's explore different ways to cure lime plaster and make it last.
- Keep moisture: Start curing right after plastering by preserving the moisture on the surface.
- Water sprinkling: Sprinkle water on the plaster daily for a week to prevent drying out too much.
- Plastic covering: Cover the plaster with plastic sheets to keep moisture in and let it out gradually.
- Slow drying: Don't let it dry too fast or it may crack. Reduce air circulation to keep it gradual.
- Environmental factors: Shield the curing plaster from direct sunlight, strong winds, or heavy rain.
- Patience: Allow 28 days for it to reach maximum strength and hardness.
Avoid any activities that could cause stress during the curing time.
Lime plaster has been used for centuries in construction for its great properties. Ancient civilizations like the Egyptians and Greeks used it for strength and durability. It's still valued today for its breathability and humidity regulation.
Options For Finishing Lime Plaster
Lime plaster offers plenty of options for beautiful, creative finishes. Here are five popular ones:
- Tadelakt: This Moroccan technique applies a special waterproof plaster and then burnishes it to a smooth finish. It's gorgeous and water-resistant.

- Stucco Veneziano: From Venice, Italy, this decorative technique layers colored lime plaster and polishes it for a glossy marble-like effect.

- Sgraffito: This involves scratching one layer of colored lime plaster to reveal another beneath, forming intricate designs.

- Fresco: An Italian technique, fresco involves painting on wet lime plaster for a soft matte finish.

- Limewash: For interior or exterior use, limewash is made from hydrated lime and water. It gives the walls a rustic look.

Plus, there are more techniques like scagliola, stenciling, and texturing with tools like brushes or combs. One architect tried tadelakt finishing on an old heritage building. It revived the original splendor and protected the structure.
Lime plaster is great for modern interiors and renovations. It's versatile, breathable, and durable. Plus, it's eco-friendly and offers endless design possibilities.
Tips And Troubleshooting
To overcome common challenges and resolve issues in lime plastering, equip yourself with these valuable tips and troubleshooting techniques. Avoiding common mistakes will ensure a successful lime plastering project. Additionally, troubleshooting techniques will help address any issues that may arise during the lime plastering process.
Common Mistakes To Avoid In Lime Plastering
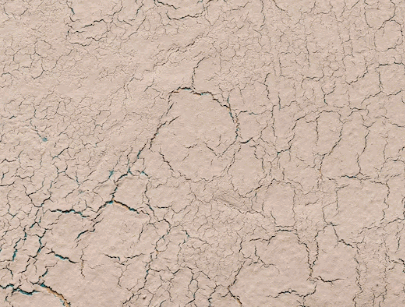
- Be careful not to spread the plaster too thickly - this could cause it to crack and take longer to dry.
- Plus, don't rush the curing process. Let each layer dry properly before adding the next one!
- Before you begin, make sure the surface is clean, primed, and damp.
- Use the right proportions when mixing - check the manufacturer's guidelines for this.
- Also, don't add too much water during the application. This can weaken the plaster and create shrinkage cracks.
- Plus, too much trowel-stroking can lead to an overworked look.
- So, follow these tips to guarantee success with your lime plastering project.
For an extra edge, consider consulting professionals or attending workshops. Hands-on experience will give you great insights on how to get the best results.
Troubleshooting Issues With Lime Plaster
Lime plaster is a great building material, but it can have its problems. Here's a guide on how to fix them:
- Cracks:
- Check the size and depth of the crack.
- Clean the surface and remove any loose bits.
- Use a putty knife or trowel to apply the patching compound.
- Allow it to dry before applying new lime plaster.
- Efflorescence:
- Check for moisture sources, like pipes or humidity.
- Fix any underlying issues.
- Gently scrub with a brush and water to remove the efflorescence.
- Don't use harsh chemicals.
- Blistering:
- Figure out why it's happening.
- Carefully scrape off loose or blistered areas.
- Reapply lime plaster with a trowel, blending into surrounding areas.
Suggestions:
- Do proper surface prep and follow manufacturer instructions.
- Use quality ingredients and tools.
- Maintain and inspect regularly.
With these steps and suggestions, you can fix lime plaster issues and keep your plastered surfaces in good shape. For more complex problems, consult professionals.
Conclusion
Lime plastering is a timeless technique. Its properties make it reliable and versatile for restoration and contemporary designs. One of its key advantages is breathability, which prevents mold and dampness. It also insulates, regulating temperature and humidity levels. Plus, its natural ingredients make it sustainable.
It has a rich history - used in ancient Egypt, Rome, and medieval Europe. Its durability and beauty can still be seen in historical buildings. Artisans and craftsmen appreciate its intricate details.
It offers long-lasting durability, improved air quality, and timeless beauty. Whether restoring an old building or creating a new space, it's a superior choice that combines tradition with modern-day sustainability.
